4-Hexo整合Fluid主题实现PV统计以及建站时间统计
1 前言(fluid + busuanzi)
本篇博客基于busuanzi统计博客页面访问次数与访问人数、及文章阅读次数,以及实现建站时间统计功能
2 PVUV统计配置
2.1 修改_config.fluid.yml中的footer内容
打开fluid的主题配置文件_config.fluid.yml,修改footer下的
statistics,将enable标签修改为true,source修改为busuanzi,这样可以在博客页面最下面看到访问人数与访问次数1
2
3
4
5
6
7
8
9
10
11
12
13
14
15
16
17
18
19
20#---------------------------
# 页脚
# Footer
#---------------------------
footer:
# 展示网站的 PV、UV 统计数
# Display website PV and UV statistics
statistics:
enable: true
# 统计数据来源,使用 leancloud, umami 需要设置 `web_analytics` 中对应的参数;使用 busuanzi 不需要额外设置,但是有时不稳定,另外本地运行时 busuanzi 显示统计数据很大属于正常现象,部署后会正常
# Data source. If use leancloud, umami, you need to set the parameter in `web_analytics`
# Options: busuanzi | leancloud | umami
source: "busuanzi"
# 页面显示的文本,{}是数字的占位符(必须包含),下同
# Displayed text, {} is a placeholder for numbers (must be included), the same below
pv_format: "总访问量 {} 次"
uv_format: "总访客数 {} 人"
2.2 修改_config.fluid.yml中的views相关内容
在fluid主题配置文件中搜索views,将enable与source两处进行设置,可以实现对每篇博客的访问次数进行统计
1 | # 浏览量计数 |
3 建站时间统计
目的:在站点页面页脚处实时显示网站运行时间 & 自定义页脚信息。
步骤
在node_modules下找到hexo-theme-fluid\layout_partials,即打开文件夹
\node_modules\hexo-theme-fluid\layout\_partials下的footer.ejs文件。在任意处添加如下代码:
1
2
3
4
5
6
7
8
9
10
11
12
13
14
15
16
17
18
19
20
21
22
23
24
25
26
27
28
29
30
31<div class="text-center">
<span id="timeDate">载入天数...</span>
<span id="times">载入时分秒...</span>
<script>
var now = new Date();
function createtime(){
var grt= new Date("12/22/2024 00:00:00");//此处修改你的建站时间或者网站上线时间
now.setTime(now.getTime()+250);
days = (now - grt ) / 1000 / 60 / 60 / 24;
dnum = Math.floor(days);
hours = (now - grt ) / 1000 / 60 / 60 - (24 * dnum);
hnum = Math.floor(hours);
if(String(hnum).length ==1 ){
hnum = "0" + hnum;
}
minutes = (now - grt ) / 1000 /60 - (24 * 60 * dnum) - (60 * hnum);
mnum = Math.floor(minutes);
if(String(mnum).length ==1 ){
mnum = "0" + mnum;
}
seconds = (now - grt ) / 1000 - (24 * 60 * 60 * dnum) - (60 * 60 * hnum) - (60 * mnum);
snum = Math.round(seconds);
if(String(snum).length ==1 ){
snum = "0" + snum;
}
document.getElementById("timeDate").innerHTML = "🚀 for "+dnum+" days"; //此次自定义显示内容
document.getElementById("times").innerHTML = hnum + " hr " + mnum + " min " + snum + " sec";
} //此次自定义显示内容
setInterval("createtime()",250);
</script>
</div>在标注处修改你自己的建站时间,同时自定义显示内容。例如笔者自定义的内容就是 “🚀 for 55 days 18 hr 09 min 37 sec”。
(可选)修改字体样式和大小:
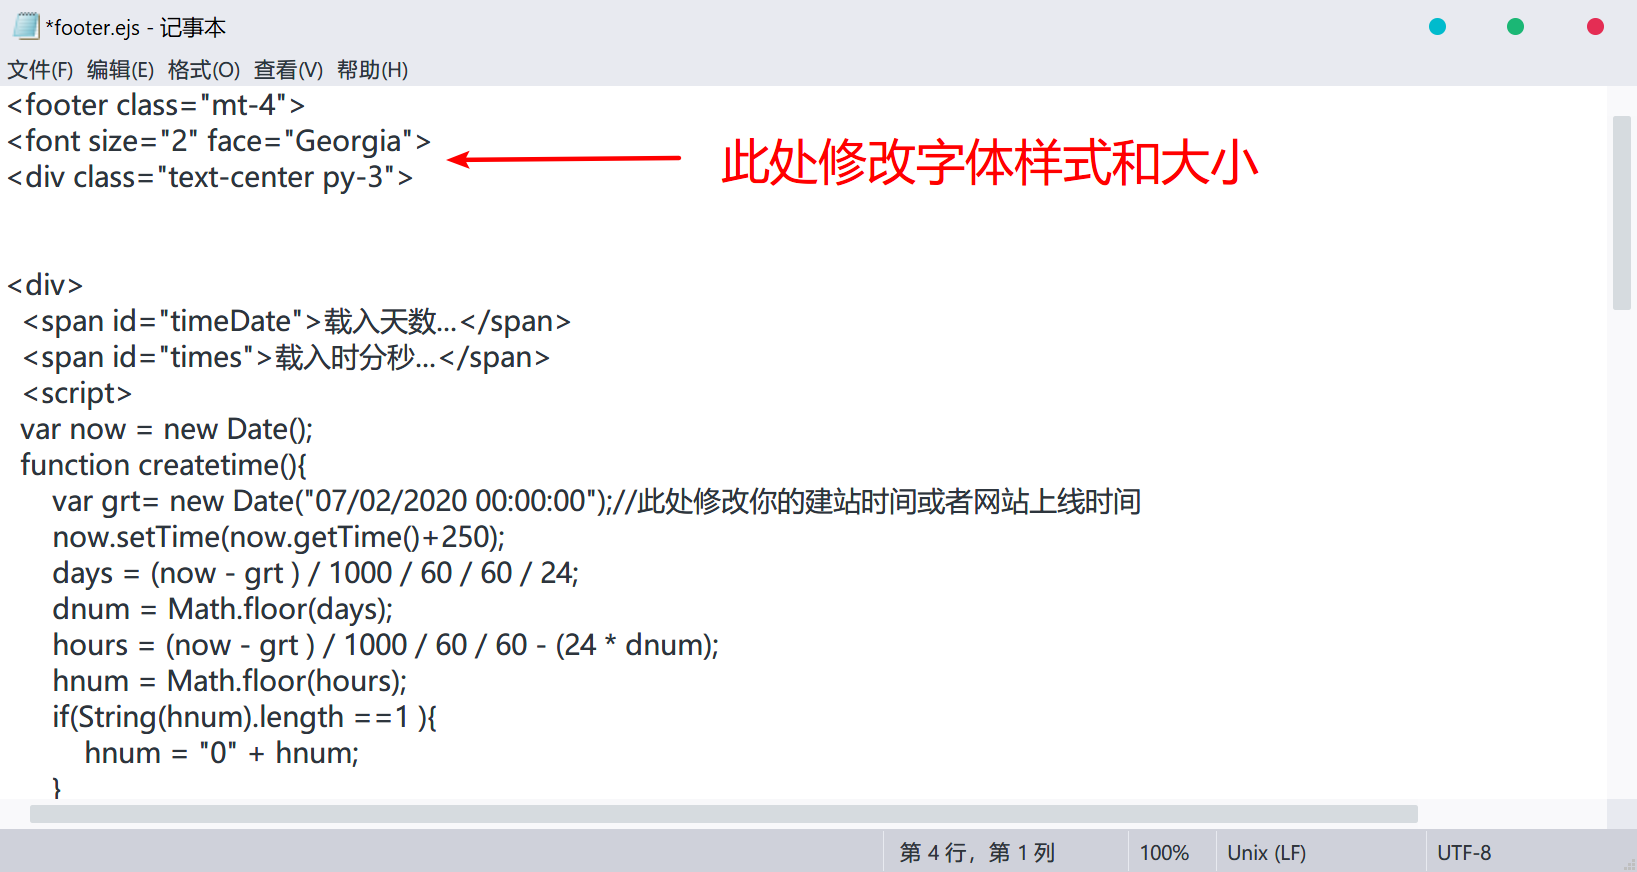
修改页脚信息,只需将
footer.ejs中对应位置改为你想显示的内容即可。例如笔者的代码如下:1
2
3
4
5
6
7<div class="text-center py-1">
<div>
<span>Copyright © 2024</span></a>
<a href="https://github.com:xianghua-2" target="_blank" rel="nofollow noopener">
<span>Hxx's Blog</span></a> <br>
</div>
</div>实现效果:

4 重新部署
最后使用hexo g、hexo d命令重新部署博客,就可以正常使用文章阅读量统计的功能了

用busuanzi会出现本地运行时pv,uv偏大的情况,但是部署到网站上后不会出现。
5 参考博客
All articles on this blog are licensed under CC BY-NC-SA 4.0 unless otherwise stated.
Comments